Classic Hardware-Inspired Music Production Techniques
This blog explores classic studio production techniques, which involve the creative use and misuse of hardware. Some studio techniques have been used for years to make records sound exciting, interesting and give them something a little extra. First up is the Abbey Road Technique.
Abbey Road Reverb Technique
Abbey Road is a studio powerhouse of innovation and has created many different techniques, such as Binaural Sound, Automatic Double Tracking and custom-built equipment. However, today it is the Abbey Road Reverb Technique that I want to discuss first because it is one that I use frequently in my own productions.
When using reverb, there are two main options. The less common approach is to put reverbs on each individual instrument. This is called using reverb as an insert effect. Now in modern music production, it is more common because computers can handle the processing and also plugins make it easy to have many instances of reverb. However, if you are not careful reverb as an insert can become a problem. A classic problem is when producers have a beat that has been made elsewhere and has one ‘sense of space’ then when a vocal is added on top, there is a different reverb applied only to the vocal. This makes the vocal feel like it is in a completely different ‘space’. The two rarely are matched and it is one of the main reasons that vocals don’t feel like like are sitting in the music, instead, if feels like the vocal is on top of the music. However, this isn’t always the case. In some situations, using a reverb as an insert of a sound can be great for sound design and for having detailed control.
The second option is to use reverb as a send/return effect. This is where you send a copy or portion of your signal out to the reverb, it gets affected by the verb and then returned to the overall balance. This is useful in studios when you might only have 1 or 2 outboard reverb units and you want to be able to have most elements share in the sense of space. This is when the Abbey Road Reverb Technique becomes really helpful.
The technique is to EQ all of the sounds that are going into the reverb, so that they have been gently filtered before they go into the reverb. Slightly filtering out and removing some of the low-end and the high-end before it gets to the reverb overall gives a cleaner result. Taking away the extremes of the signal improves the sound of the reverb overall. If the sub-bass lows were allowed into the reverb, they can quickly become undefined, muddy and loose. If the super-highs are allowed into the reverb, they can sound glassy and cheap. So removing these areas before they hit the verb stops those negative factors from happening before they can arise. For me personally, I like to roll the low end off at around 350Hz and the top end around 6kHz, but this can be adjusted to taste.
To be creative you could build on this idea. You could follow the reverb with a dynamic EQ for example. This could be to clean up the mid-range around 500Hz and dynamically control that area. You could also follow the reverb with a side-chain compressor to make a little more room for the vocal when it is playing. Another idea is to add some modulation, saturation or delay after the reverb to manipulate its tone further.
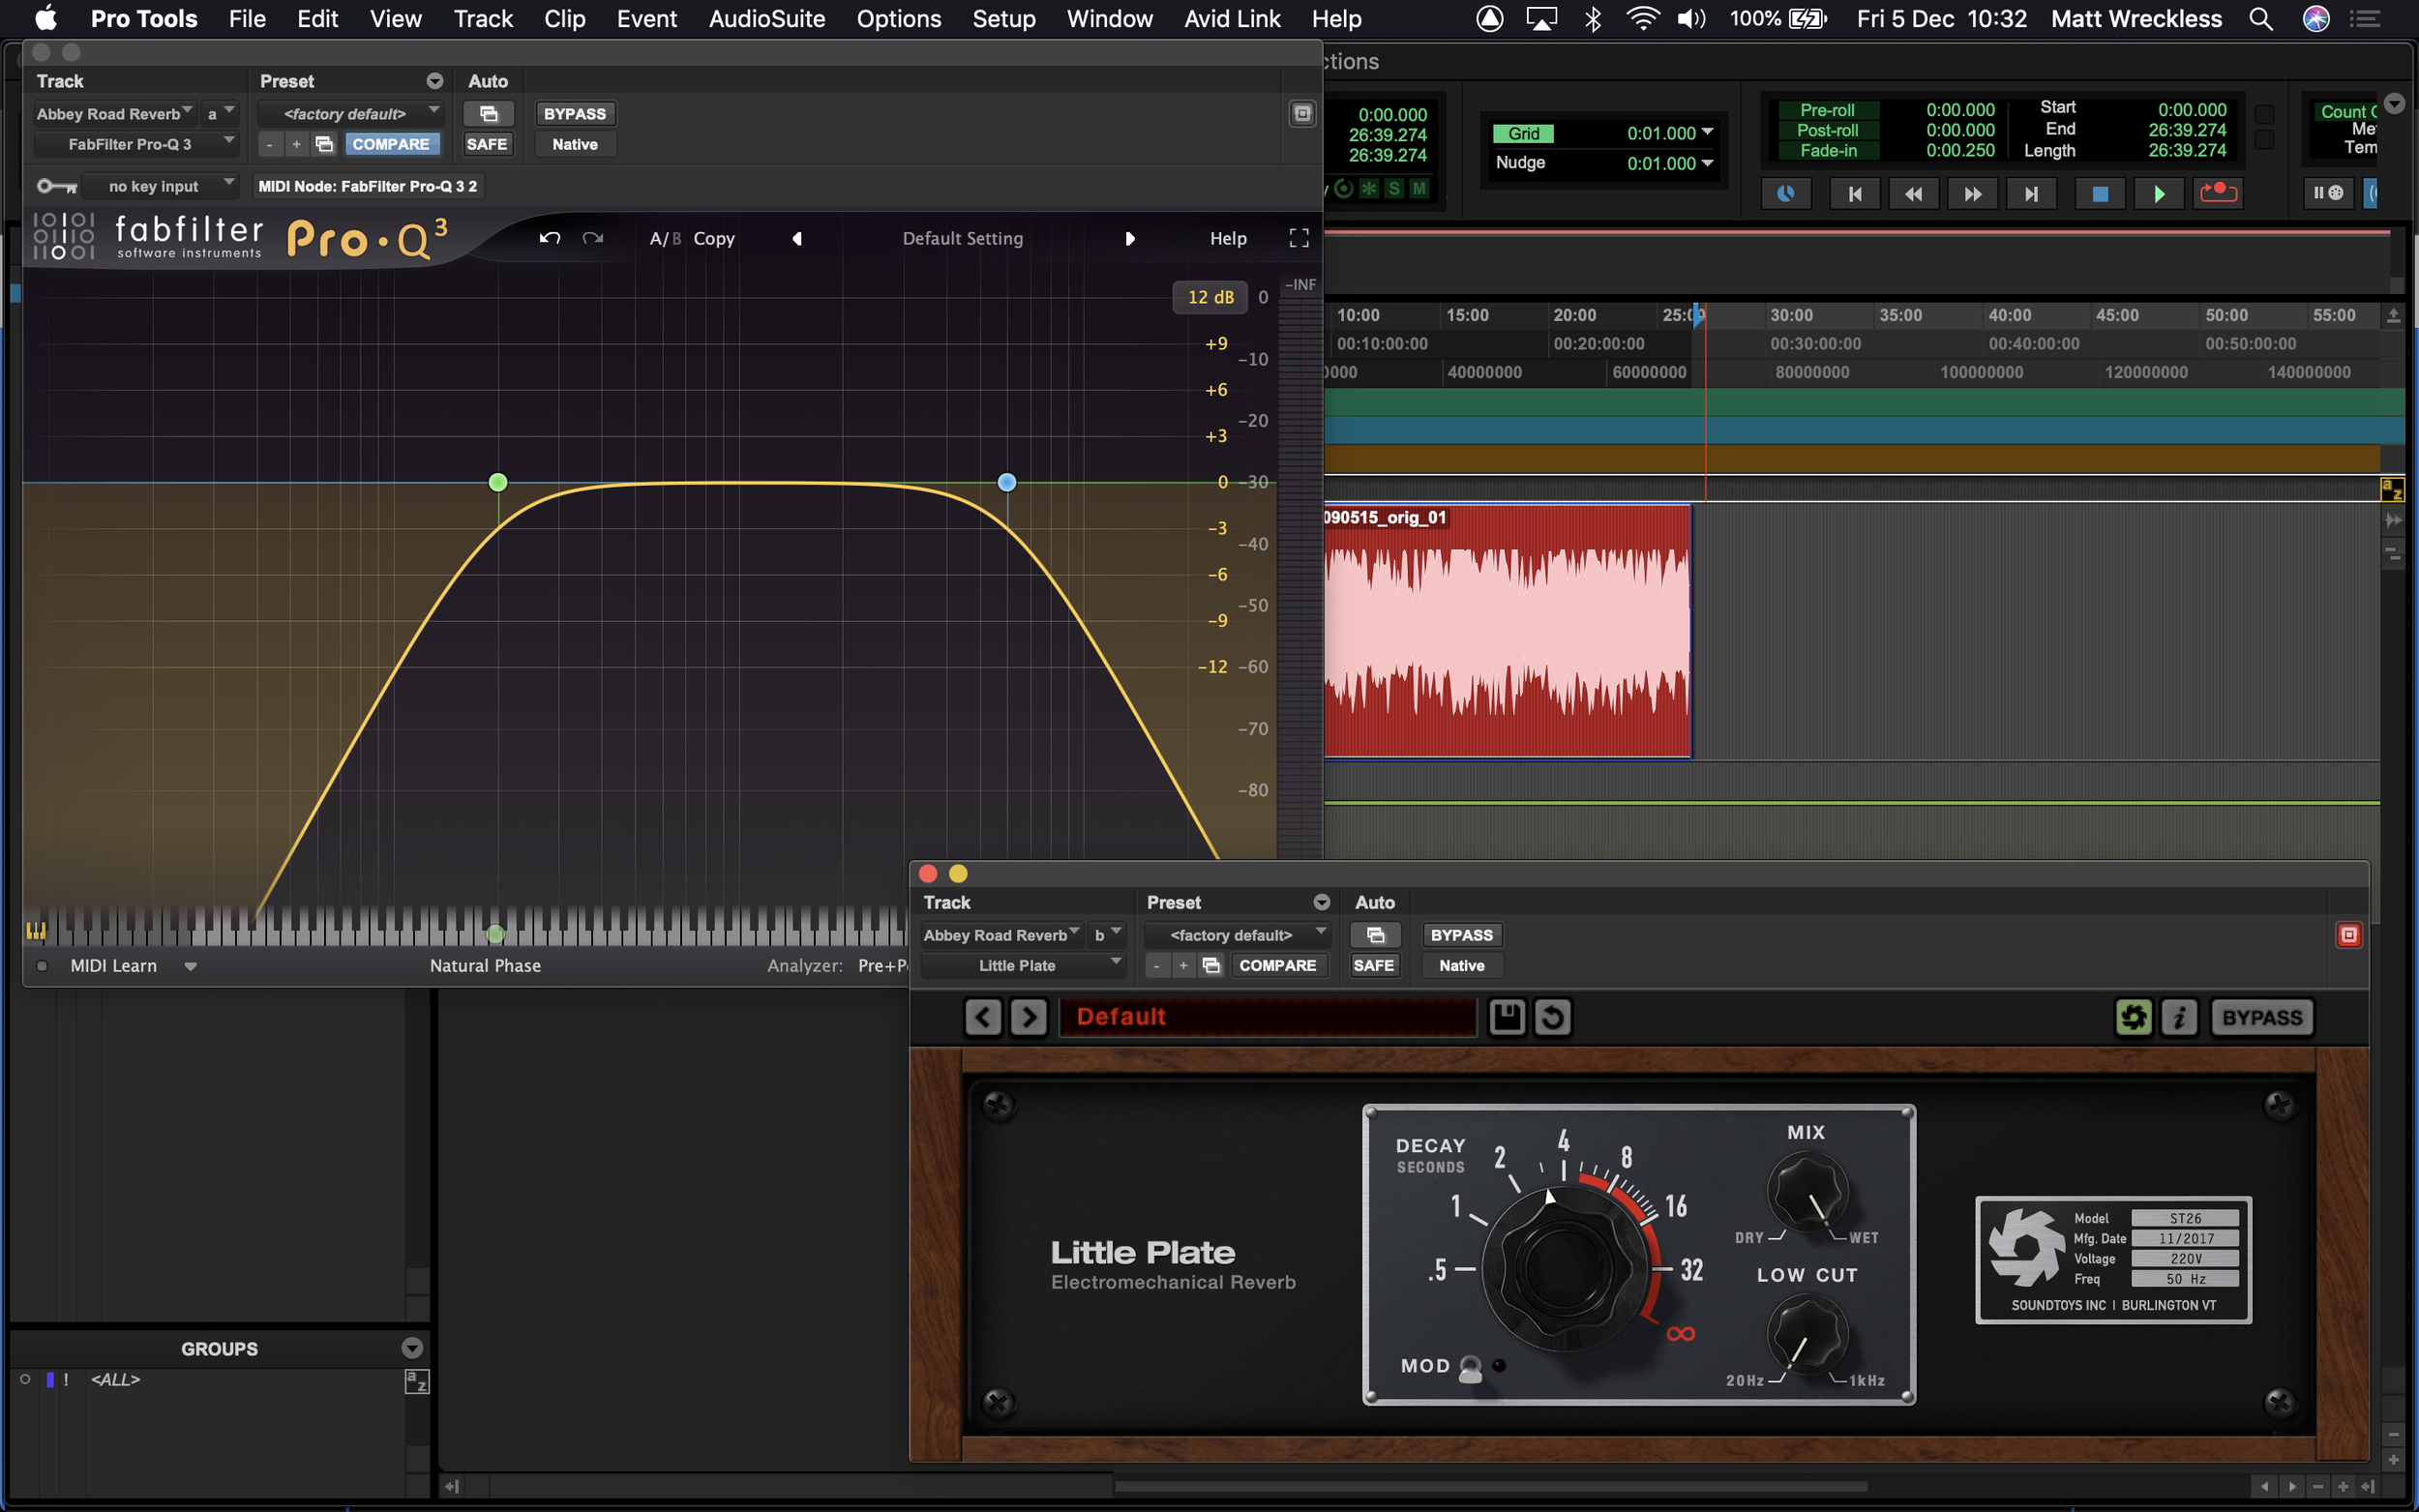
The Abbey Road Reverb Technique - recreated in Pro-Tools with ProQ at 200Hz and 6kHz and Sound Toys Little Plate Verb.
All Buttons In
The 1176 is a classic compressor with tonnes of character. It is known for being relatively fast in terms of analogue compression, and also gives a touch of harmonic distortion from the transistors. There are normally 4 options for the compression ratio on the hardware units: 4, 8, 12 and 20. However, engineers found that if you pressed all of these at the same time, you could create a harmonically rich, aggressive compression sound that is ideal for drums.
One thing that catches people out with the 1176 is the attack and release. They are normally labelled 1-7, which I don’t find to be the most helpful. One thing to remember is that the full clockwise side is fast (number 7 is fast) and the counterclockwise side is slow (number 1 is slow).
To get the all buttons in sound you first push in all 4 ratio buttons, then you drive the input to create compression and distortion and you can level match at the same time with output gain. Set both the attack and release to fast initally but you can experiment with the timing controls. The reason to try out this techniques is becuase it can emphasies all of the tails of sounds, ambience and reverbs around a sound and also becuase the attack and release are so quick, this can add to the distortion of the sound. This is a great technique for both drum and bass parts to give them extra grit and presence. This can be use in parallel or as an insert on the sound.
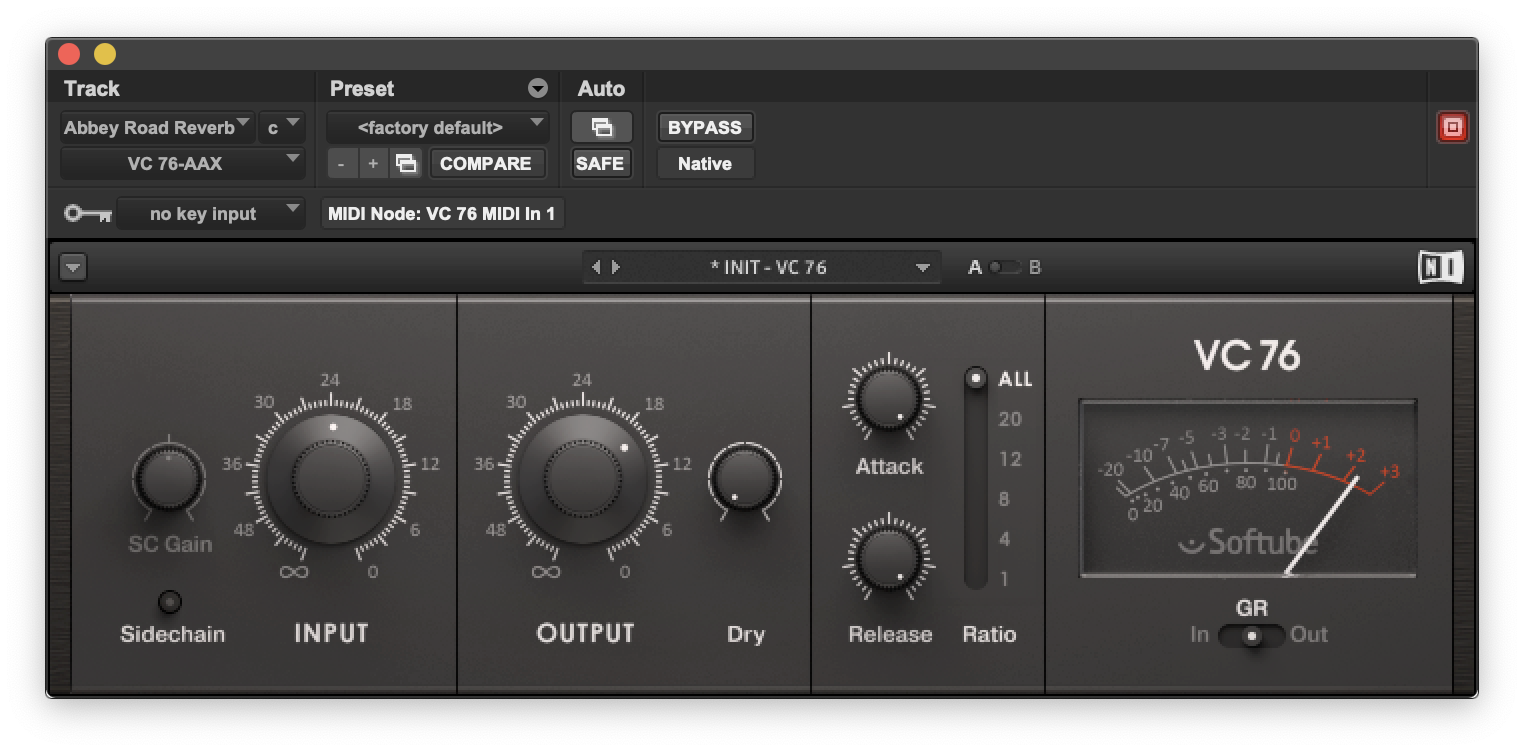
Even the Native Instruments emulation on the 1176 had an all buttons mode added to recreate this iconic sound.
Push and Pull EQ
The Pultec EQ is well known in the industry and has been used in many different applications, from radio broadcast to the recording studio. One interesting thing about this piece of hardware is that you could boost and attenuate the same frequency simultaneously. This is where the Push & Pull EQ technique came from. By selecting 100Hz for example, you would create a strange filter shape around the target. This is because the shape and Q-width of the boost and the attenuation are not perfectly matched. This became a classic technique over the years and can be really useful on bass, drum bus and low-end instruments. It can be used to add weight and richness to the overall sound.

A pop art inspired image of Cartec emulations of the Pultec EQ.
New York Compression
This is a technique that lots of people discuss under the name parallel compression. However, I think that NY compression is a little more nuanced. First of all, this is normally applied to vocals. Secondly, it is a technique that needs both compression and EQ. It starts by making a copy or Aux Send of a signal (normally a vocal). The first thing to do is to compress the vocal really hard, with a fast attack and release, low threshold and moderate/high ratio. This will achieve a serious amount of gain reduction of around 15-17dB if it is working correctly. Then, you follow this with a bright top-end EQ shelf boost, and you can be quite bold with the EQ amount. This parallel is then layered in with the original sound. This is my version of NY compression, anyway. The reason that it works is that the vocal is so compressed that nothing jumps out dynamically. It is completely flat. Then, when you add the top end, it is added consistently across the sound, which makes it more suitable. When you blend it back in, you only need a little to feel like the vocal is clear and upfront.
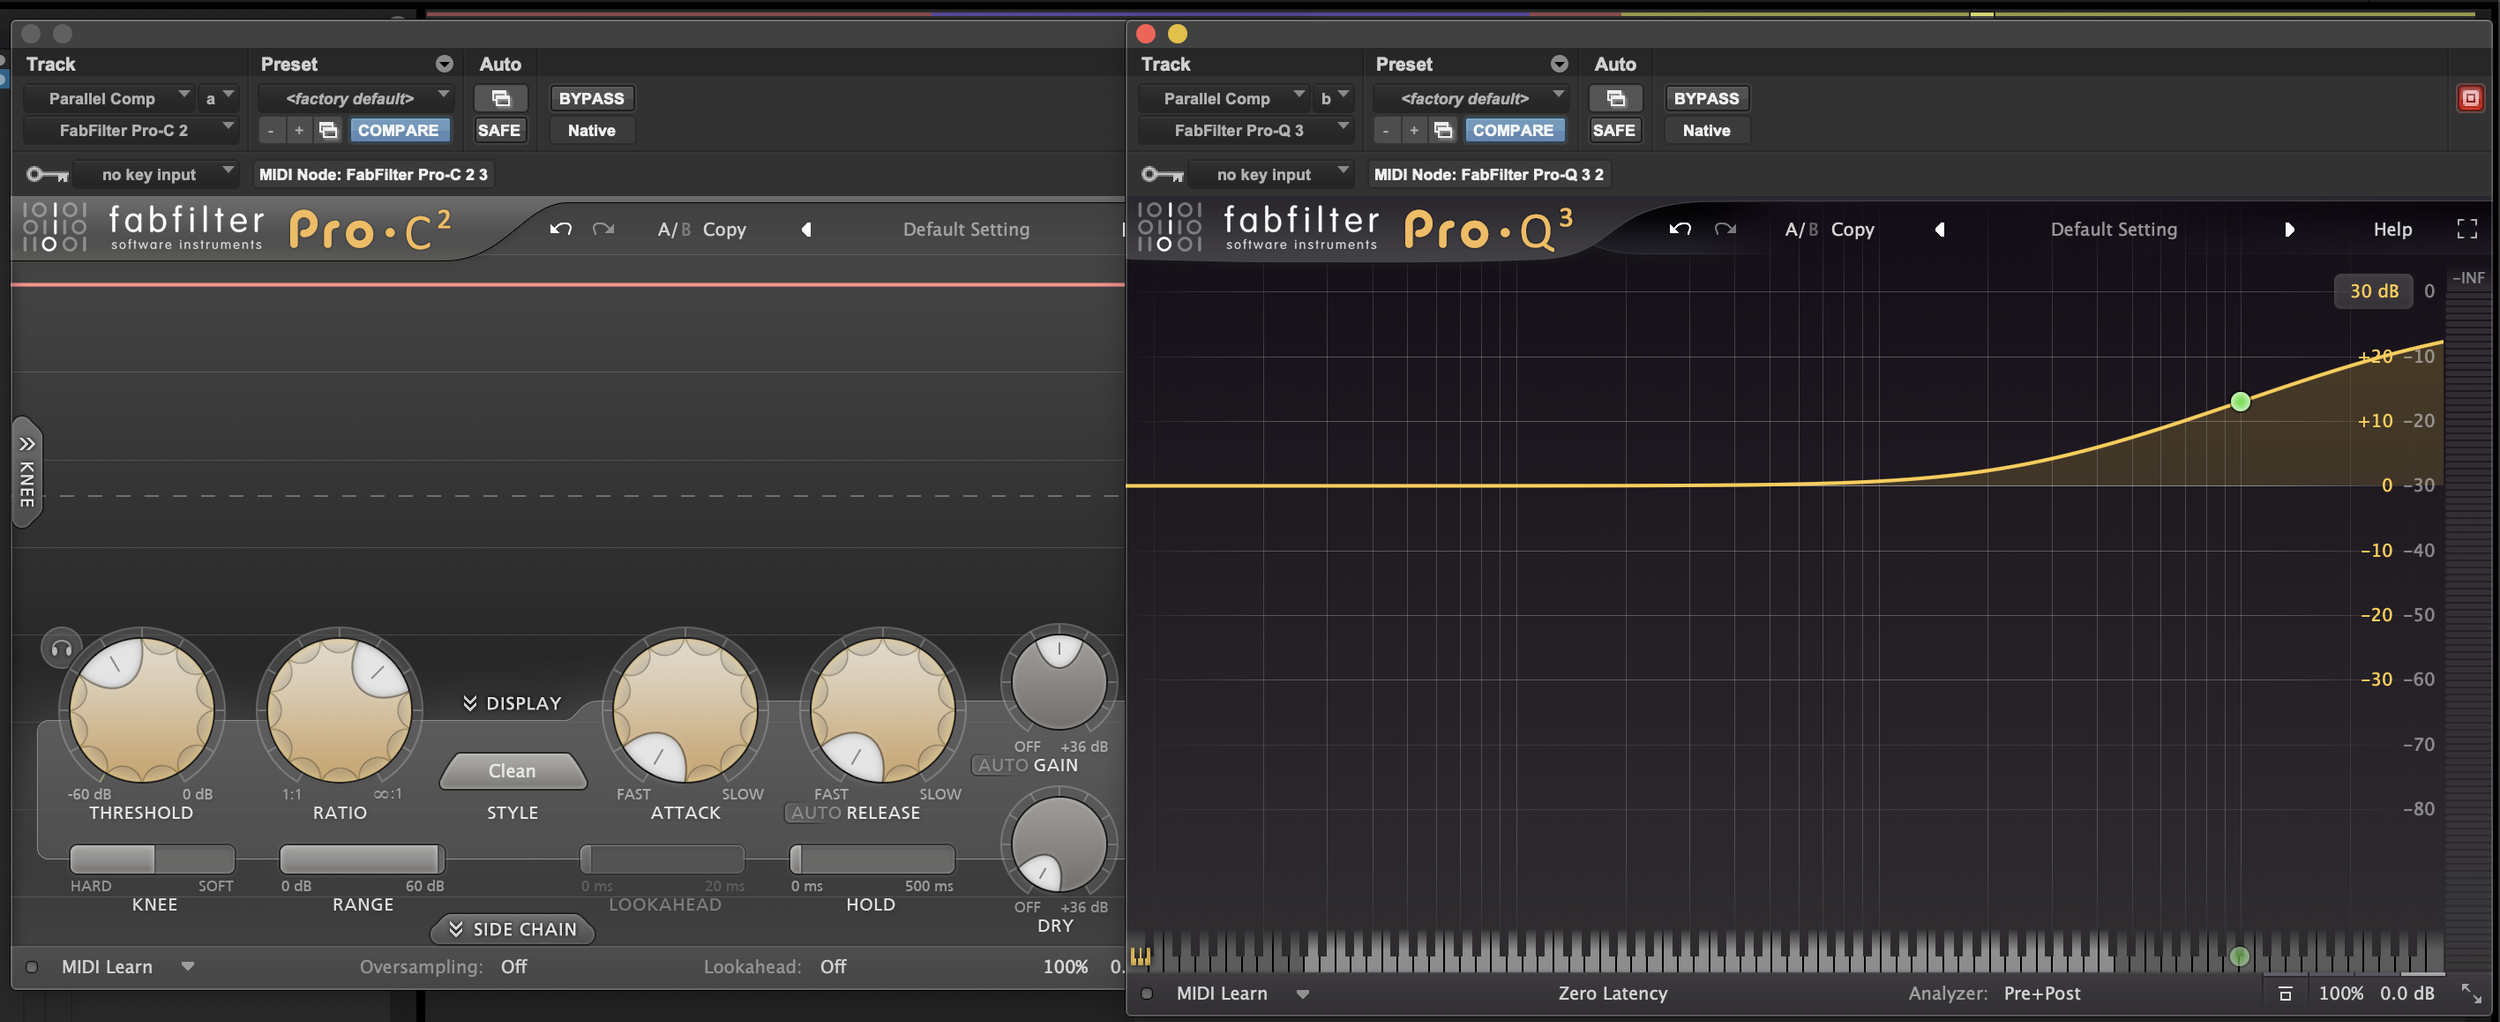
The compression first, followed by the EQ gives more dynamic control before adding lots of top end.
Rear Bus Compression
This is a technique from Andrew Scheps when using an SSL mixing console. Originally, the consoles were made for quadraphonic sound and this means that the mixbus had stereo for both front and back, specifically LF, RF, LR and RR. In most normal stereo applications, you would only use the left and right front for the mix. This means that there is a master stereo bus L&R rear, which is up for grabs and free to use.
The rear bus technique makes use of this free bus and you send everything apart from the drums to be compressed by the G-bus compressor. This blend of the track (minus drums) gets compressed together and then added back into the overall mix. This can create a sense of cohesion and togetherness for the overall track.
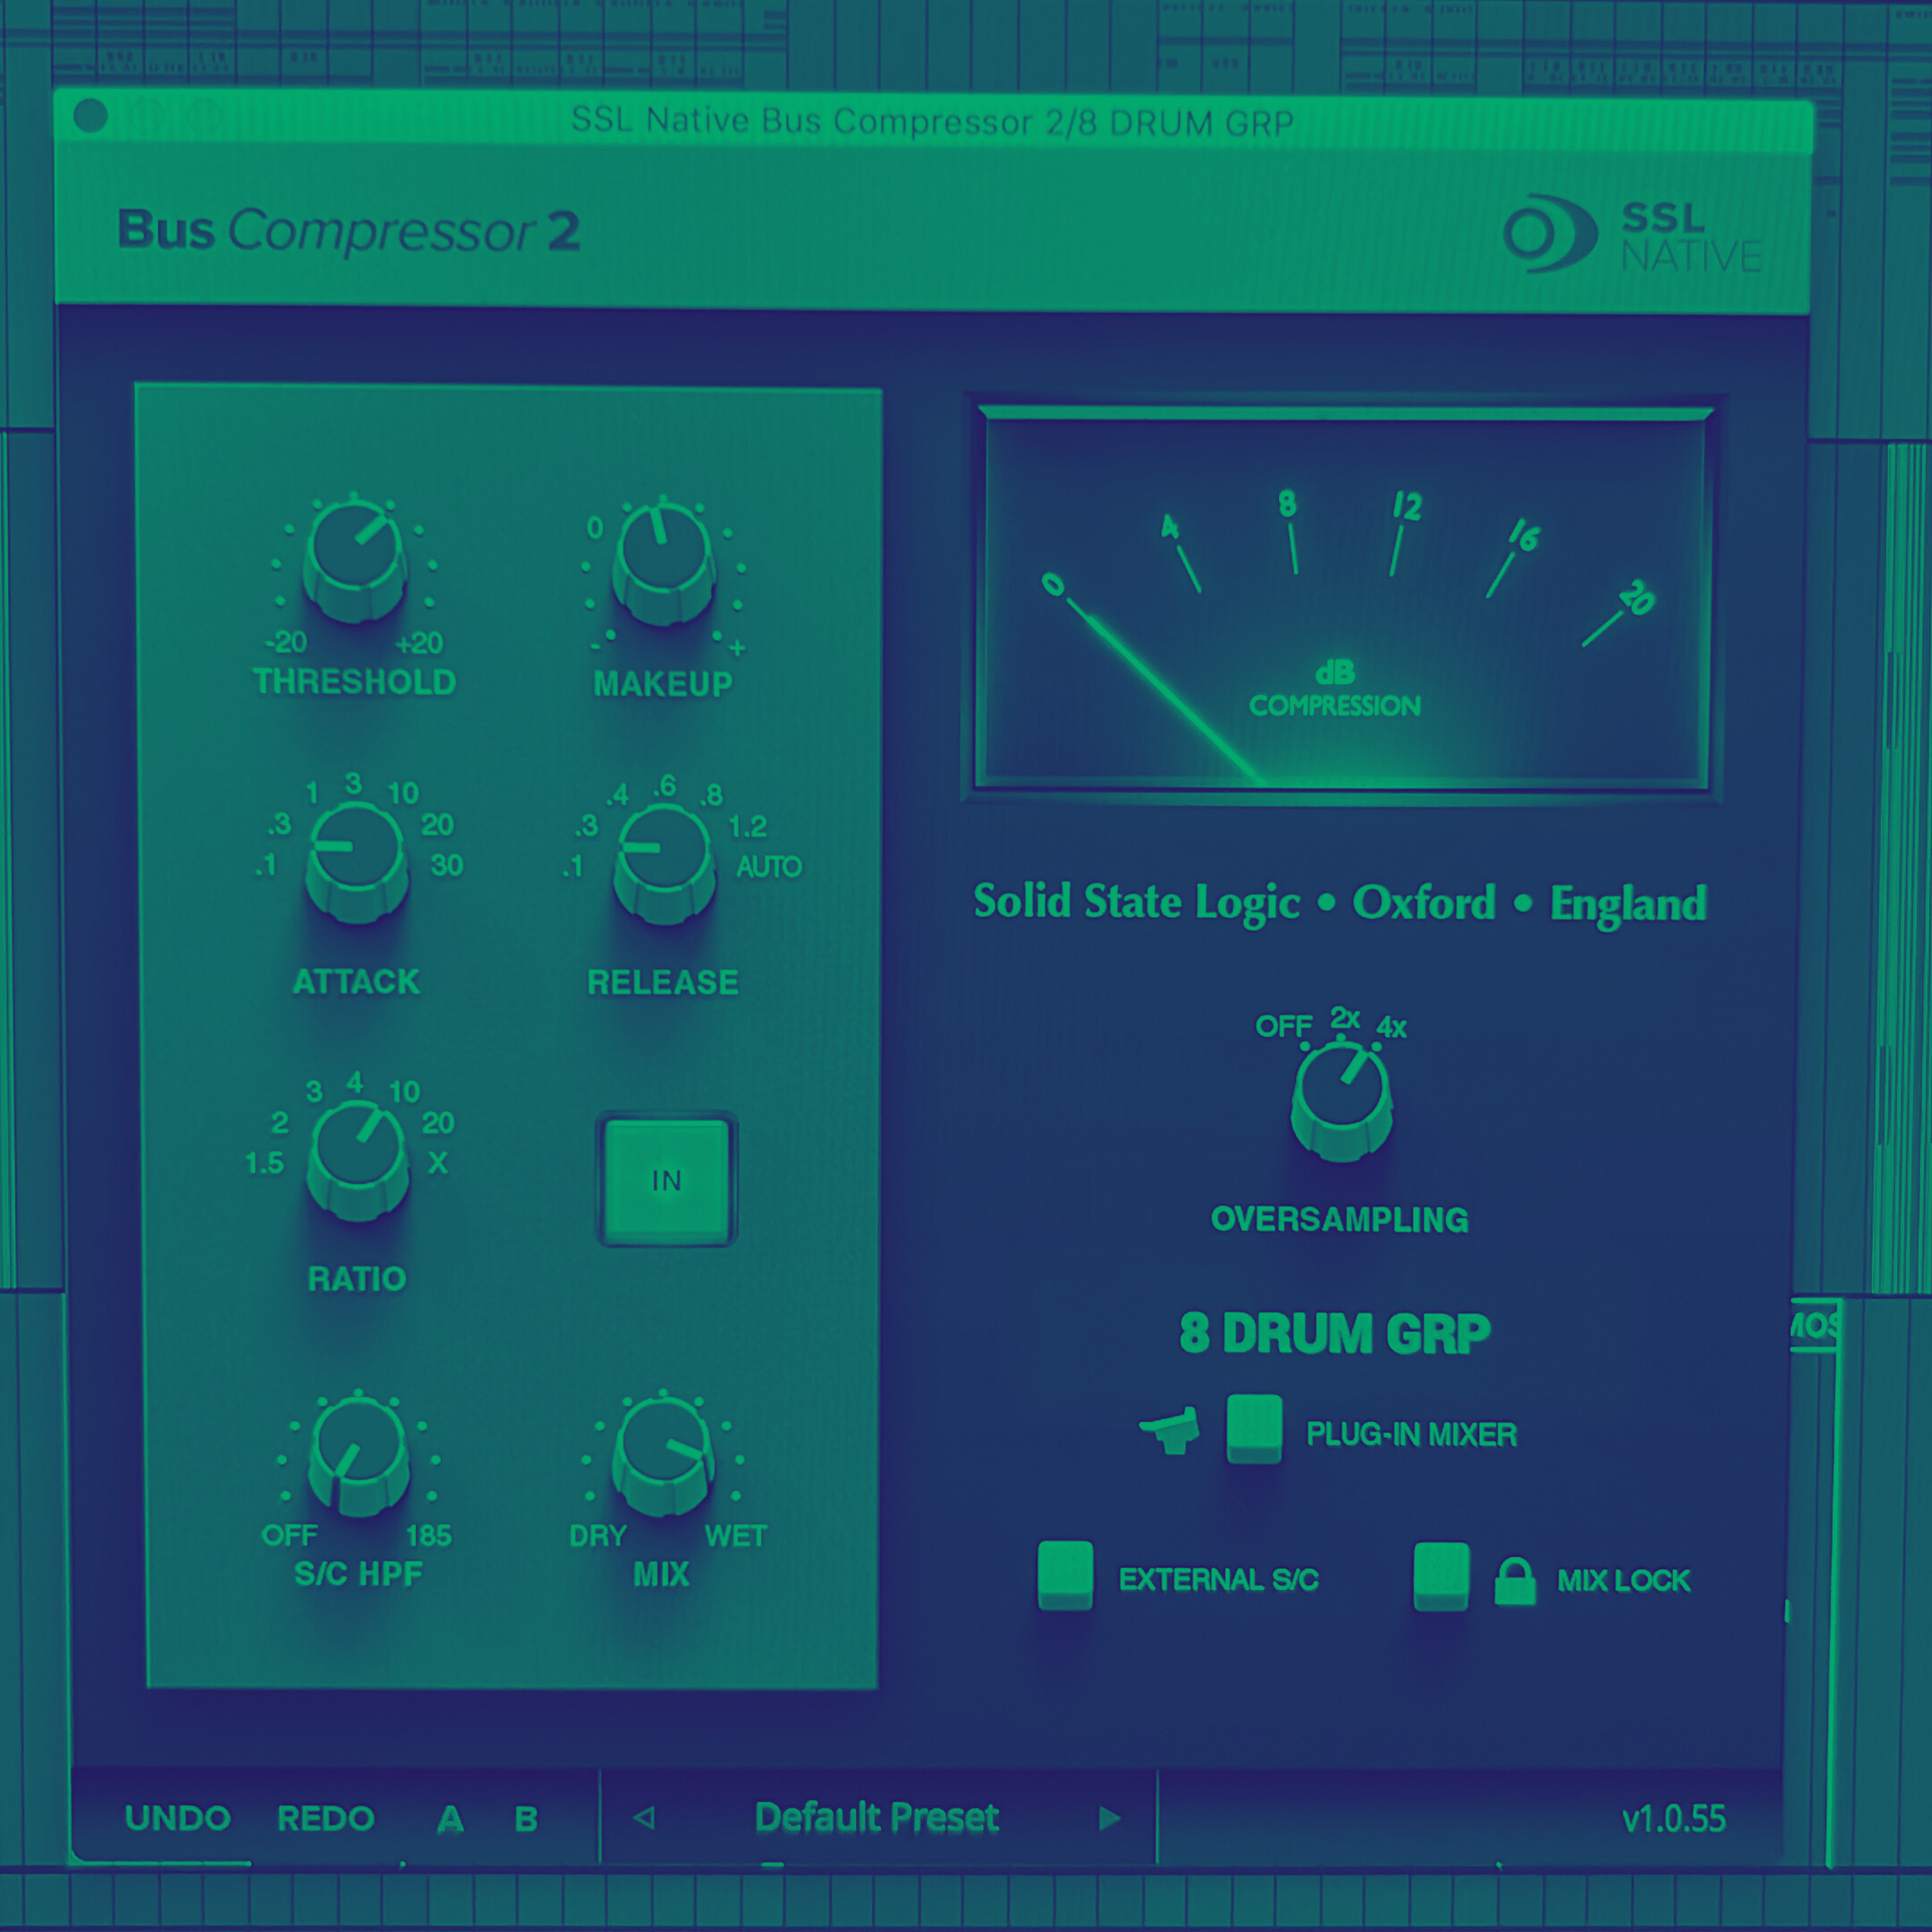
A digital emulation of the legendary SSL bus compressor.
So that concludes the round up of 5 modern techniques in music production that are inspired by classic outboard and hardware. If you are looking for a mixing engineer that can use techniques like this and many more to give a professional sound to your production, then please get in touch for mixing and mastering services.
This is for mixing and mastering services combined
You will send me your song (as multi-tracks, stems or audio files) and I will deliver a final stereo mix and master which you can use as the final release for your music.
You can also provide 1-2 reference tracks of pro songs similar to the final result you want to achieve. This will help to guide the type and style of final result that you are looking for.
The main styles that I mix are Pop, Electronic Music, Dance, R&B, Hip-Hop, Experimental, Ambient, Folk, Blues and Spoken Word.
If you want someone who will mix and master your track with professionalism, care, attention to detail and excellent sonic results. Look no further.
My approach is to be as conscientious as possible, letting your music be the focus. Mixing techniques and processes are used to highlight the ideas, narratives and concepts in your music and present them to a sonically high standard.
Balancing creativity and technicality is an important part of my process and a rare combination of skills. A blend of both has stood the test of time. Sometimes you need to throw caution to the wind, other times you need careful millisecond-accurate processing. Each track is an individual piece of work which contributes to the final project and should be treated as such.
Mix translation onto different systems is another key aspect of my workflow, to check that your idea translates on as wide a range of sound playback devices as possible.
A final area of concern for my work is creating dynamic music that keeps life and groove in the music.
When you purchase this service, there will be a form to complete. This will ask for some details, links to the audio files required, and possible references. There will also be a space to communicate your ideas for the song(s). If you are not sure, let me know and I will be happy to help to get the deliverables I need so you can get a great final result.
Each mix can be revised twice; after 2 revisions, more revisions can be purchased, if required, for a small fee.
Hopefully, this gives you enough information to get started. If you have any questions about the mixing and mastering process, please use the FAQ section, which has more information.
Delivery time for the mixes will depend on the amount of work I currently have and also the size of the song/project. Larger projects will take more time. Approximate delivery times can be provided. Please get in contact for more information.
You can expect a response within 1 working day when purchasing this service.
Matt Chapman5th December 2025